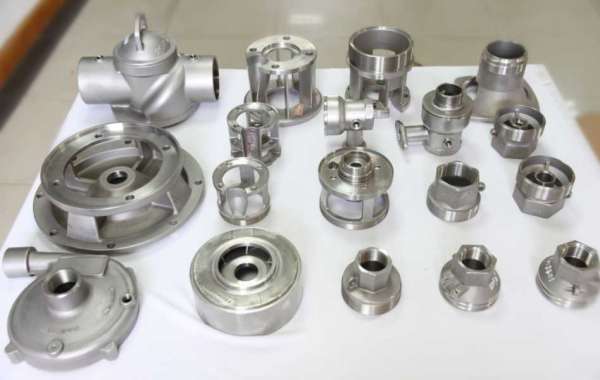
Lost Wax Investment Casting
Lost wax investment casting can produce high-quality investment castings with complex shapes and high dimensional accuracy. In addition to this, the process offers a great deal of freedom in design and material selection. Your specific wishes and requirements can be incorporated into castings. With our decades of experience in the lost wax method, we can guarantee you a very efficient production process and high quality castings.
Characteristics of Lost Wax Technology
Lost wax castings are also known as the highest quality steel castings on the market. They are typically used in quality-critical environments, as these components often operate in aggressive (hostile) environments, with large temperature differences, or in environments that require exceptional rigidity, robustness, or light weight. Due to these special and high requirements, special alloys are often used for these castings.
Lost Wax Investment Casting Process Stages
1: Spray wax model
Through the lost wax method, high-quality investment castings with complex shapes and high dimensional accuracy can be produced. In addition to this, the process offers a great deal of freedom in design and material selection.
Step 2: Wax Model Painting and Tree Construction
The mold is filled with liquid wax. After the wax cools, injectors in the mold push the wax model out. The same wax model as the final casting has now been sprayed. The wax models are glued to a so-called wax tree with a casting funnel on top, into which the steel is poured later in the process.
Step 3: Rinse the wax tree
After gluing the wax models to the wax tree, rinse them off. Remove any possible contamination from the surface to ensure successful adhesion of the ceramic to the wax tree.
Step 4: Build the Ceramic Layer
After rinsing the wax tree, the tree gets a fire-resistant ceramic shell. The shell is made after repeatedly dipping the tree in the grout (up to 7 or 9 times) and dusting it with ceramic sand. The ceramic layer is then hardened in a drying chamber exposed to air.
Step 5: Autoclave
After the layers are formed and dried, the wax is melted out of the ceramic tree by using steam (120°C) in an autoclave. That's why it's called "lost wax casting." Most molten waxes can be regenerated and reused.
Step 6: Sintering
The ceramic tree is then baked (baked) at high temperatures around 1100°C and reaches its final strength through a sintering process. During this process, any wax residue will be burned off.
Step 7: Casting
The required steel alloys are melted and brought to casting temperature in a large 800 kg furnace. Meanwhile, the ceramic tree is heated in the oven to prevent thermal shock during pouring. After the tree is heated, the robotic arm removes it from the oven and fills it with the steel alloy by means of anti-gravity. After the trees are downed, they are placed on a cooling conveyor, where they are cooled down. (with nitrogen).
Step 8: Finish
The tree is then removed from the ceramic casing by breaking the casing with a fully automatic hammer. This removes most of the ceramic. The next step is to cut the product from the tree by sawing or vibrating. The remaining steel will be sorted by alloy and can be remelted in the next casting process.
Step 9: Sandblasting, Sanding and Visual Inspection
The finishing department removes the last piece of ceramic by blasting steel, sand and/or water. The remaining ingate is ground off the casting after the sawing process. In order to properly grind the product, a grinding jig is usually used.
The quality department visually inspects all products for casting failures. This inspection is carried out according to a quality standard sheet to ensure that all possible surface faults are correctly corrected.
Step 10: Machining, Heat Treating and Surface Treatment
Some alloys require heat treatment to achieve a certain hardness, tensile strength or elongation according to 2D drawing specifications. Standard heat treatment is performed in-house and complex processing is outsourced.
Surface treatment involves the coating process of steel surfaces to enhance the surface's appearance or protect it from external influences such as corrosion (rusting) and natural wear (damage).
Step 11: Final Inspection
The final step in this process is to perform another visual inspection and, if necessary, write a measurement report and material analysis. After final inspection, the product is ready to be shipped to another satisfied CIREX customer.


