How to take apart a shark navigator vacuum cleaner?
Vacuum cleaners can be a big investment, and it's important to take them apart and clean them regularly to keep them running efficiently. This how-to guide will teach you how to take apart a shark navigator vacuum cleaner, so that you can clean all the internal parts properly.
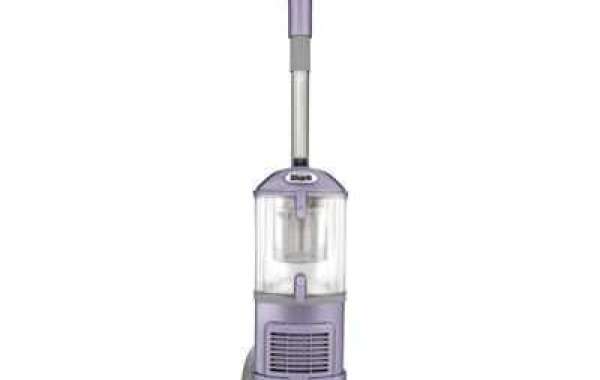
What is a Shark Navigator Vacuum Cleaner?
A Shark navigator vacuum cleaner is a unique type of vacuum cleaner that uses a map of the room and sensors to track the movement of dirt and allergens. This type of vacuum cleaner is perfect for people with allergies or pets who are prone to getting dirt and dust in their airways.
To take apart a shark navigator Cordless vacuum cleaner, first remove the body from the base. On the bottom of the body, there are three screws that need to be removed. The next step is to remove the front cover and upper filter assembly. The front cover will have two screws that need to be removed, as well as the upper filter assembly which has one screw. Once these are all removed, the filters can be cleaned and replaced if needed. The brush roller can also be cleaned if necessary. Finally, replace all of the screws and put everything back together.
How to Take It Apart?
If your shark navigator vacuum cleaner is giving you problems, there are a few things you can do to take it apart.
The first step is to identify the main body of the vacuum cleaner. This will be either a large, rectangular base with two upright tubes coming out of it, or a triangular base with three tubes coming out of it. On each side of the base will be two panels that open and close to control the suction power.
The next step is to remove the screws that hold the panels in place. Be sure to note their locations so you can replace them correctly when you put the vacuum cleaner back together. Once the panels are off, you'll see four wires attached to them.
Disconnect the wires from their plugs on either side of the base and remove the base entirely. You may need to use a screwdriver to pry apart the plastic casing around each wire plug. Once they're free, twist each wire around a metal spacer until it's snugly against the casing. Replace the base and screws, and reattach the panels. Plug in all four wires and test the vacuum cleaner's operation.

image source: https://www.pinterest.ph
Inside the Machine
When it comes to vacuum cleaners, there are a few different types that you might encounter. One of the most popular types is the shark navigator vacuum cleaner, which is known for its powerful suction and ability to deep clean. If you're looking to take your shark navigator vacuum cleaner apart, below are some Vacuum cleaner Supplier instructions on how to do so.
To begin, remove the dustbin from the vacuum cleaner by turning it upside down and pulling outwards. Next, remove the dust cover by unscrewing it from the front of the machine.
Once the cover is removed, locate and remove the main motor assembly by unscrewing it from the base. Once removed, detach all of the wires and replace if needed.
Next, locate and remove the brushroll unit by unscrewing it from the top of the main motor assembly. Once removed, wash and clean as needed.
Replace all of the parts in reverse order and reattach everything using screws. Finally, replace the dustcover and turn your shark navigator vacuum cleaner back right-side up.
Parts of the Shark Navigator Vacuum Cleaner
There are many different parts to a shark navigator vacuum cleaner, and figuring out how to take them all apart can be a task in and of itself.
In this article, we will go over the different parts of the Shark Navigator vacuum cleaner, and provide steps on how to take them all apart.
First off, you will need a Phillips head screwdriver.
Next, you will need to remove the handle from the vacuum cleaner. To do this, first unscrew the four screws that hold it in place. Once they are removed, pull the handle off of the vacuum cleaner.
Next, remove the filter cover by unscrewing the two screws on each side. Once it is loose, pull it off of the vacuum cleaner.
Now you will need to remove the dirt cup and bag. To do this, first unscrew the two screws that hold them in place. Once they are removed, lift both components up and out of the vacuum cleaner.
Next, you will need to remove the power cord from the vacuum cleaner. To do this, first unscrew the two screws that hold it in place. Once they are removed, unplug the power

image source: https://www.pinterest.ph
Putting It All Back Together
If your shark navigator WetDry vacuum cleaner is starting to show its age, it's time to take it apart and give it a tune-up. Follow these simple steps to get your machine back in working order:
1. Remove the dirt container and bag
2. Unplug the power cord
3. Remove the front panel
4. Remove the back panel
5. Remove the motor assembly
6. Clean the filters
7. Reassemble the machine
Conclusion
If your shark navigator vacuum cleaner is giving you trouble, it might be time to take it apart and clean it. This guide will show you how to do just that, so get ready to enjoy fresh suction with a clean machine.


